Copyright © 2007 - 2026, Coachworks For contact data Click Here.
Copyright © 2007 - 2026
Copyright © 2007 - 2026,
Coachworks For contact data
Click Here.
![]()
...We now have an exhaust system! There is no place in the world you
can just go and buy a pre-made Denzel exhaust system. So, naturally, you just
have to make one! 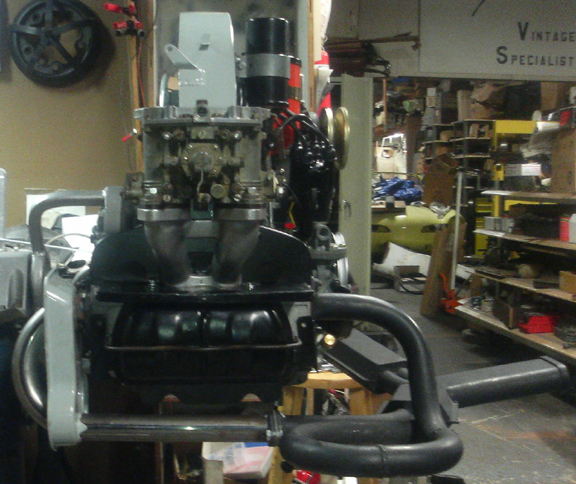
Wolfgang Denzel tried to be nice to us by providing cast ends that bolt to the exhaust port and you then weld onto your pre-existing exhaust - after cutting off whatever flanges it came with. You can see a cast foot on our site over here.
We haven't any spare exhaust castings, however. So, a friend of ours took a perfect profile of one, put it on a laser cutter and made us a few flanges from thick pieces of flat bar stock of mild steel. While he was at it, he made some out of thick copper sheet stock and these are now our gaskets!
OK, first part - some kind of flange - we've got handled. Now, weld on to your existing exhaust system... But the stock VW exhaust pipes are too small in diameter for us! So, that rules out VW.
Porsche systems are available, but very expensive. And, they don't have quite the right detail for us, such as the radius of bend out of the J pipes and the lateral rotation where all the sheet metal fits, and the fact that the stock Porsche 356 and 912 mufflers foul the coachwork of a Karmann Ghia!
 So,
we have, of course, made our own.
So,
we have, of course, made our own.
A friend gave us an abandoned set of pipes of an appropriate diameter that we figured would make a good starting point. Key parts were:
 The
rest was our problem. There were no flanges attached...
The
rest was our problem. There were no flanges attached...
Unfortunately, in our exhuberence, we forgot to take photos of the header as we got it, but did take some of the fabrication process and some with just the header mounted.
In the following three images we show you the finish work, often overlooked, involved in mounting an exhaust flange to a J-tube. To be successful, the flange must fit the head perfectly and seal, and it must be fully welded to prevent exhaust leak on the flange to pipe connection. And, it must be cleaned up so that there are no obstructions to flow - much as one cleans up an intake manifold.
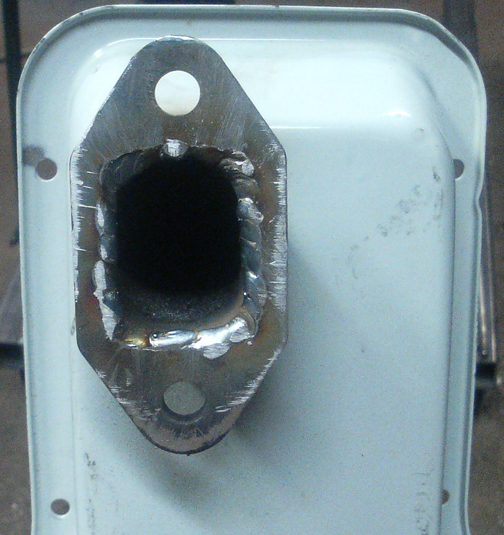
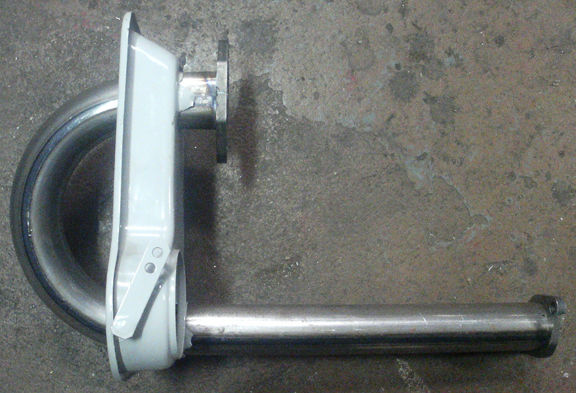
In this first image, we see the weld all the way around, and a file has been drawn across the flange to discover how flat it is. Note the high spots are shiny and the dark places are "low" relative to the file's teeth.
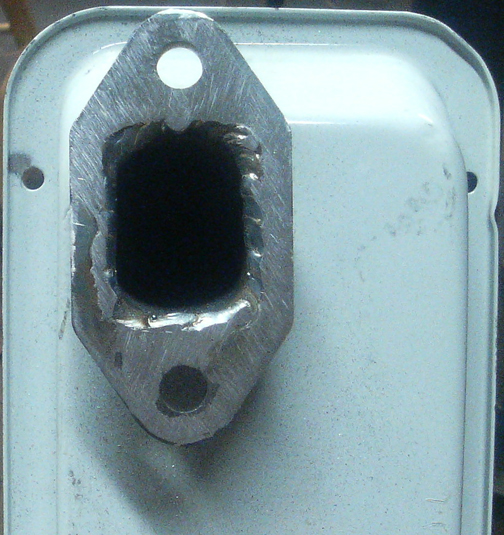
In this second image, we see the work has progressed but there's still a way to go - the whole flange must be flat!
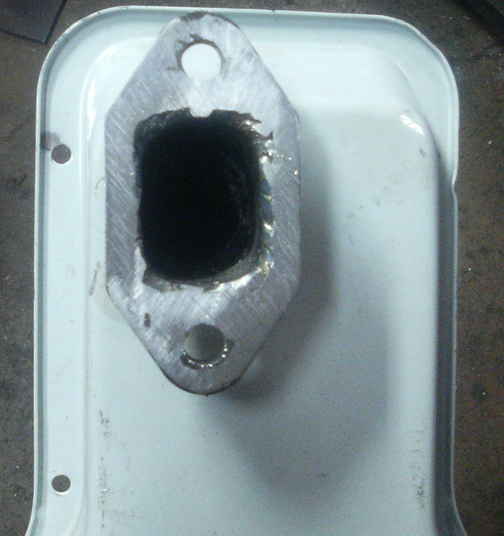
And, finally, we have the finished flange. Harder to see in these images is that the transition from rectangular to round happens here, too, and a carbide cutting burr has been used to smooth the transition, and this photo was taken before that work was completed. Note that a spare gasket, previously fitted to the head, was used to finish the shape here as it is the gasket, not the head, primarily because all three have to match each other but also because the gasket makes a nice portable template!
 The
process of welding, flatening, and "porting" the VW flanges used on
both sides of the header to J-tube connection is much the same. In all, the
above process was repeated 8times - once for each exhaust port at the heads,
and once on either side of the J-tube to header connections.
The
process of welding, flatening, and "porting" the VW flanges used on
both sides of the header to J-tube connection is much the same. In all, the
above process was repeated 8times - once for each exhaust port at the heads,
and once on either side of the J-tube to header connections.
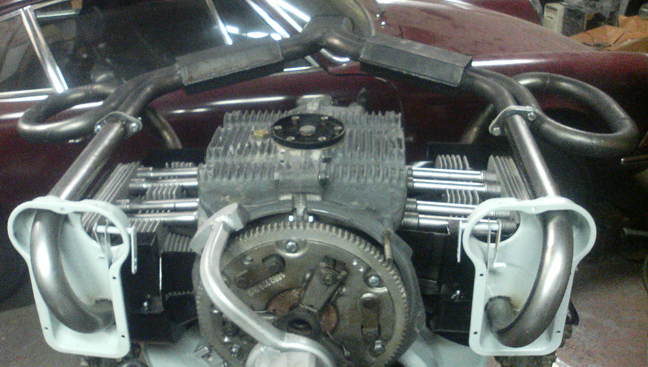
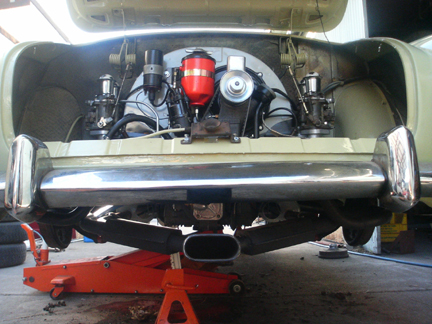
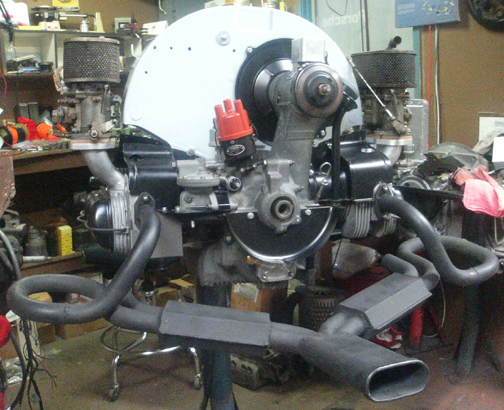
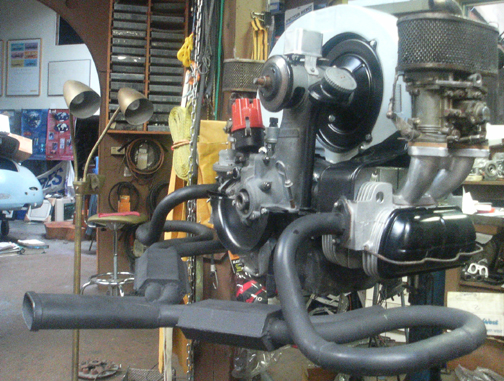
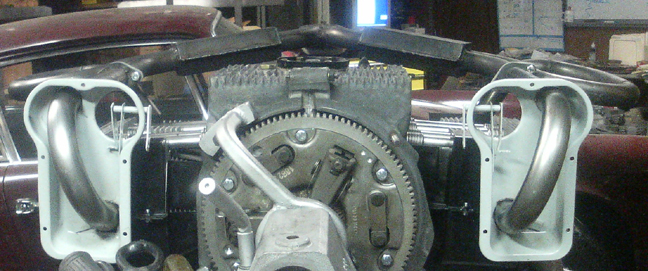
The whole system, complete and mounted, ready for service. No, we won't finish off the heater boxes! We wouldn't be running the forward parts of the J-tubes if it weren't for the fact that we intend to put this engine into actual road service (de-tuned, of course!) following the LSR runs. Gotta have heat!
Note that the tail pipe has to exit under the coachwork, so the stinger has to be lower, hence the canted angle above.
And now here it is installed!